

概述
之前写了一篇使用PowerCLI 运维vSphere和Horizon的文章,可能写的比较糙,今天重写一篇稍微详细一点的文章,也方便大家阅读。
安装PowerCLI
要安装PowerCLI,你至少需要确保你的PowerShell版本不低于5.1
可以使用Windows的PowerShell执行下面的命令进行安装
Install-Module VMware.PowerCLI或者点击官网下载安装包手动安装
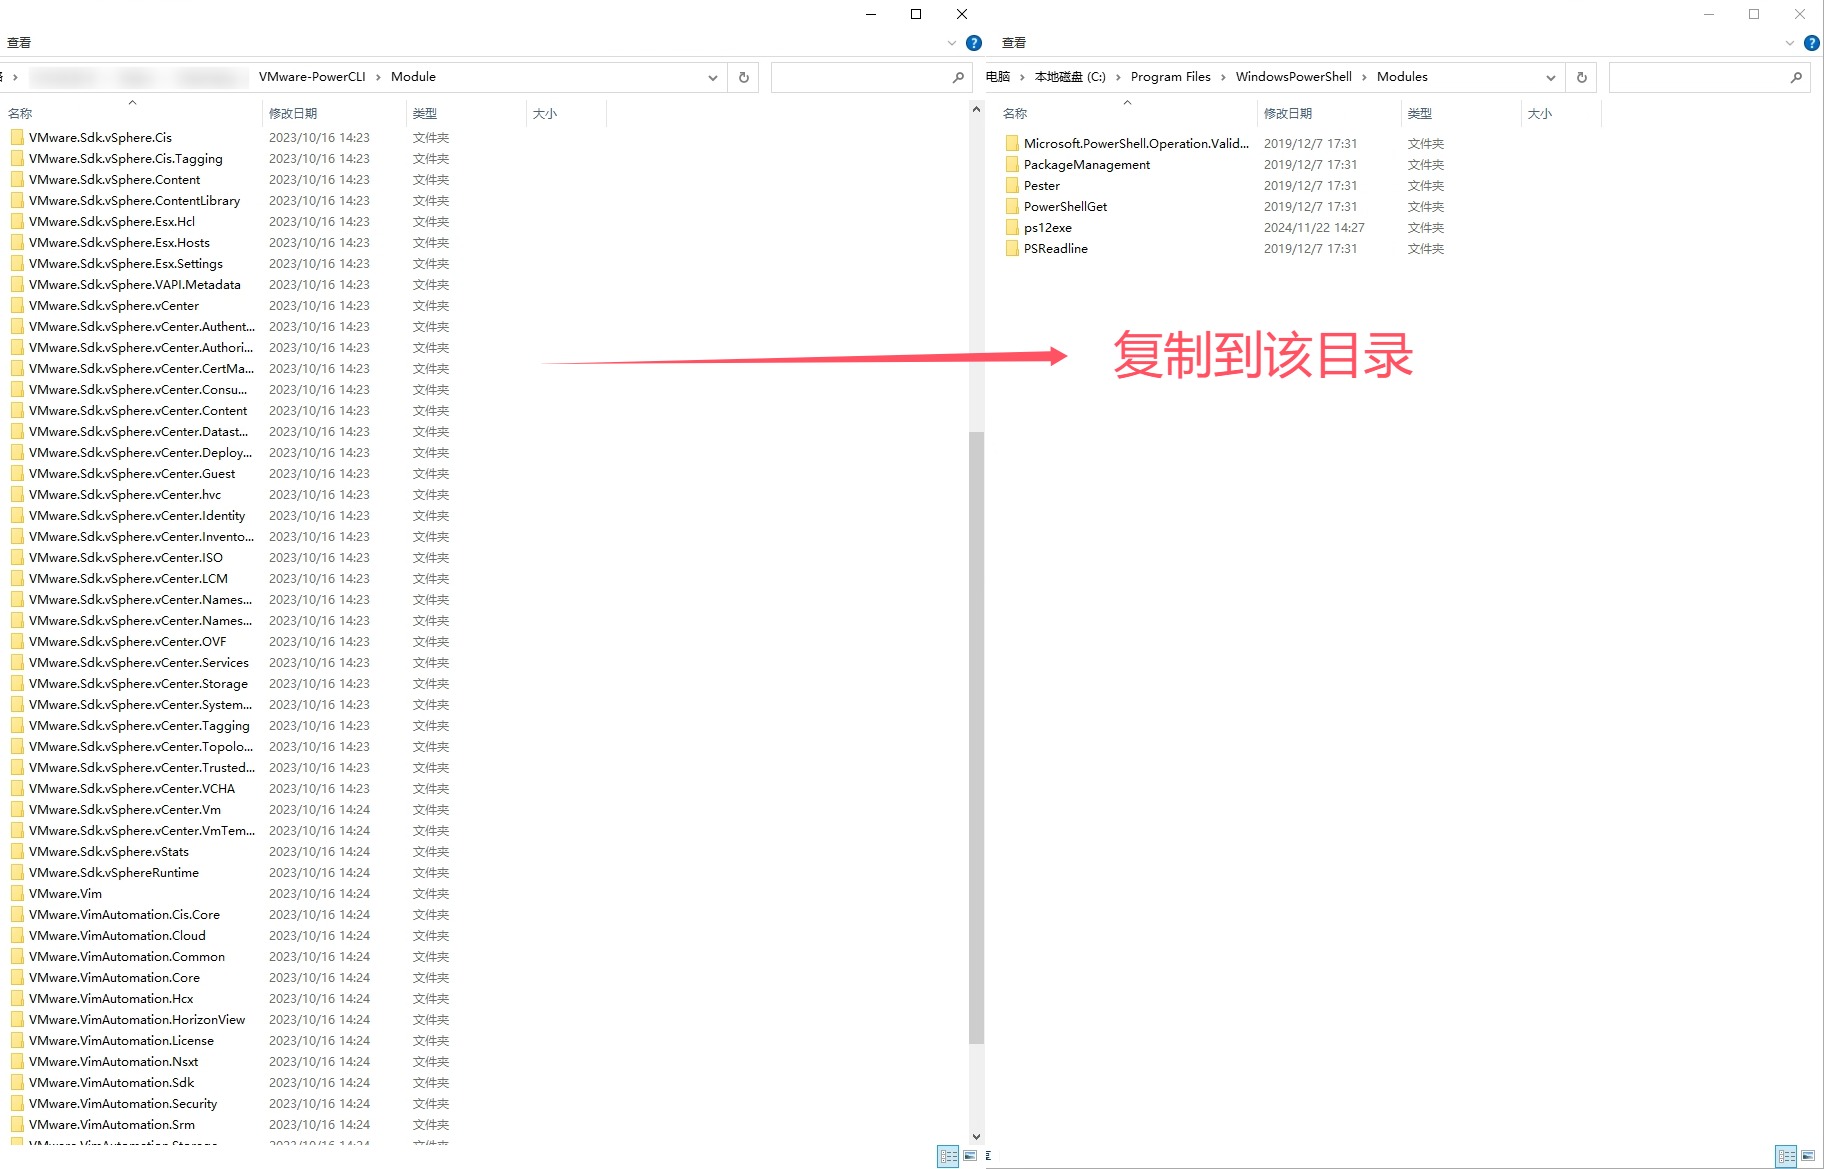
导入Module
先将Module导入当前操作系统,路径为:C:\Program Files\WindowsPowerShell\Modules
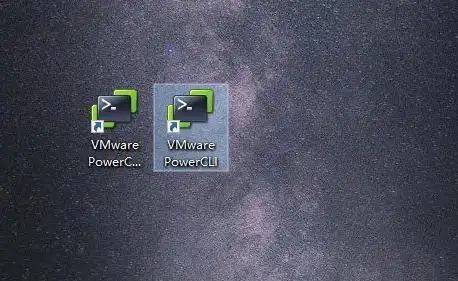
安装完成后,桌面多了2个图标,如下,一个是32位的,另一个是64位的,根据系统情况运行。
初次运行会提示是否加入VMware的客户体验改善计划(“CEIP”),选择输入”L”就行了

使用Demo
这里我只示例一些常用的脚本,需要将 vcsa.nnkin.local 、administrator@vsphere.local、VMware1! 这些参数更换为你实际的。
批量调整虚拟机内存,可以指定单个虚拟机名称或使用 * 作为通配符。
Connect-VIServer -Server vcsa.nnkin.local -User administrator@vsphere.local -Password VMware1!
$vms = Get-VM 'VM_NAME'
$vms | Set-VM -MemoryGB 10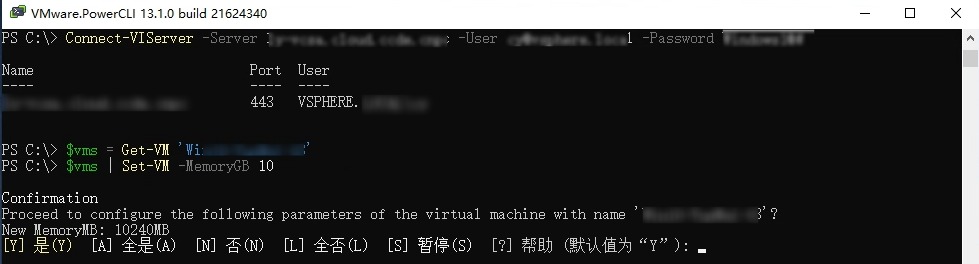
迁移虚拟机至另外一台主机(14迁移到15)
Connect-VIServer -Server vcsa.nnkin.local -User administrator@vsphere.local -Password VMware1!
 Get-VM -Name VM -Location 10.132.61.14| Move-VM -Destination 10.132.61.15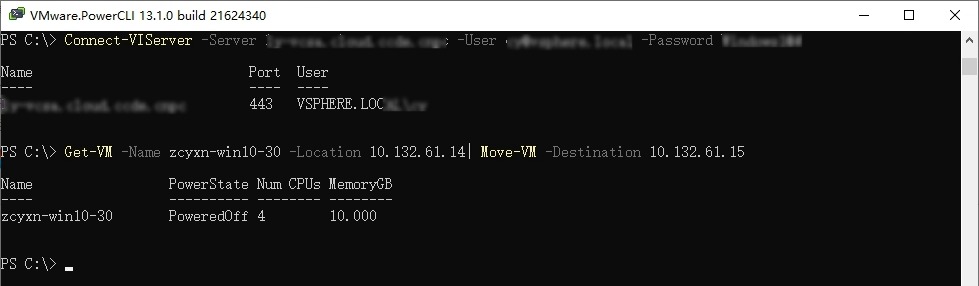
重启虚拟机操作系统
Connect-VIServer -Server vcsa.nnkin.local -User administrator@vsphere.local -Password VMware1!
Restart-VM -Confirm:$false win10-yunwei-05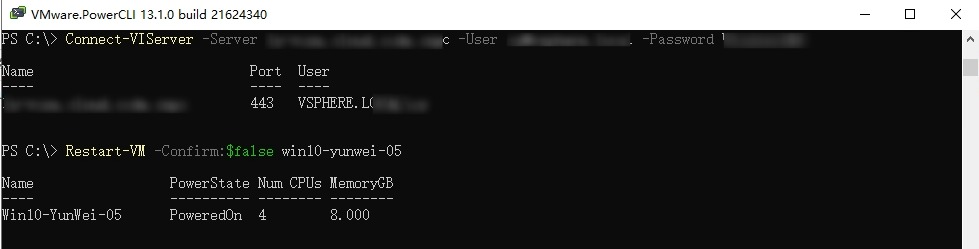
关闭虚拟机操作系统
Connect-VIServer -Server vcsa.nnkin.local -User administrator@vsphere.local -Password VMware1!
Stop-VMGuest win10-yunwei-05 -Confirm:$false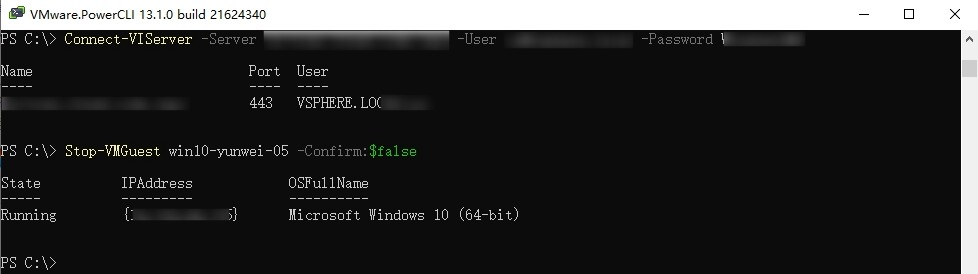
批量创建虚拟机
1..2 | foreach {New-VM -Name NUONUO-TEST-00$_ -ResourcePool VDICluster -Datastore VDINTNXStorage -NumCpu 2 -MemoryMB 4 -NetworkName "VM Network" -Floppy -CD -DiskStorageFormat Thin}
使用模板批量克隆虚拟机
$vc = '192.168.1.103' #VCenter IP
Connect-VIServer -Server $vc -username "myUsrName" -Password "myPassword"

$vmhost="192.168.1.11" #esxi host
$namestart="myClient"
$template="myTemplate1"
$datastore="datastore2"
$custsysprep = Get-OSCustomizationSpec myCustSpec
$ipstart="192.168.1."
$endipscope=100..150


#循环生成50台虚拟机
foreach ($endip in $endipscope)
{
    $ip=$ipstart+$endip
    $name=$namestart+$endip
    $custsysprep | Set-OScustomizationSpec -NamingScheme fixed -NamingPrefix $name
    $custsysprep | Get-OSCustomizationNicMapping | Set-OSCustomizationNicMapping -IpMode UseStaticIP -IpAddress $ip -SubnetMask 255.255.255.0 -Dns 192.168.1.1 -DefaultGateway 192.168.1.1

    New-vm -vmhost $vmhost -Name $name -Template $template -Datastore $datastore -OSCustomizationspec $custsysprep
}

0